Batch processing or batch editing is undoubtedly one of the most powerful features that Adobe Lightroom is blessed with. Where Adobe Photoshop stands as the world’s best imaging and graphic design software, with this particular tool, a user can apply specific settings over a group or bunch of photos by using the technology and power of batch processing along with non-destructive editing. Apart from group editing, even single images can be fine-tuned individually so as to add structure and clarity to the entire setup.
The Lightroom batch processing program speeds up your editing workflow apart from keeping your photos organised. With batch editing, multiple photos can be processed at once. As such, they prove to be the biggest time savers provided by Adobe Lightroom.
Once you start using Lightroom batch processing for your photos, you will never be able to go back to the time where you did without it till now.

There are four different ways in which batch edit Lightroom techniques can be implemented. They are:
Technique 1: Applying Presets on Import
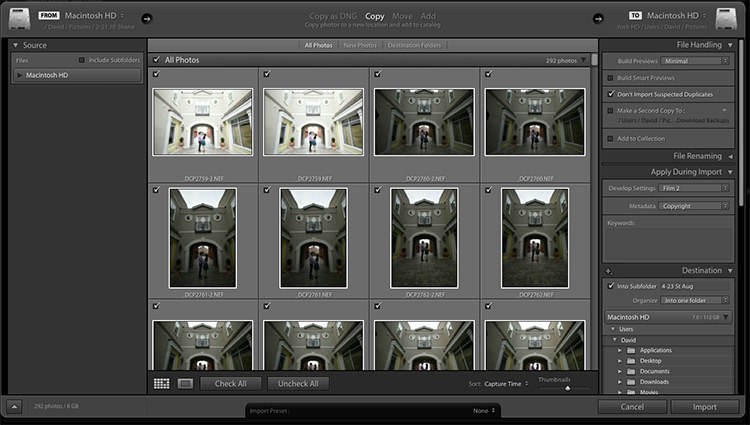
Presets permit you to frequently use edits and adjustments to your clicks instead of manually adjusting the settings for every new image. This is a hugely popular and common feature of Adobe Lightroom known to all. However, what most people do not know is that you can apply your favourite preset at the time of importing the image to cut short many unwanted steps in between.
Here is a step-by-step guide on how to do this.
- First, begin by importing the library module.
- There is an ‘Apply during import’ module on the right panel in the import dialog. Select it.
- Select your base preset or most commonly used preset here and click on import. All your photos will automatically get imported to Adobe Lightroom.
This will enable you to skip many clicks and apply them faster instead of going through the rigmarole of selecting them individually later in the develop module.
Technique 2: Apply Presets in the Library Module
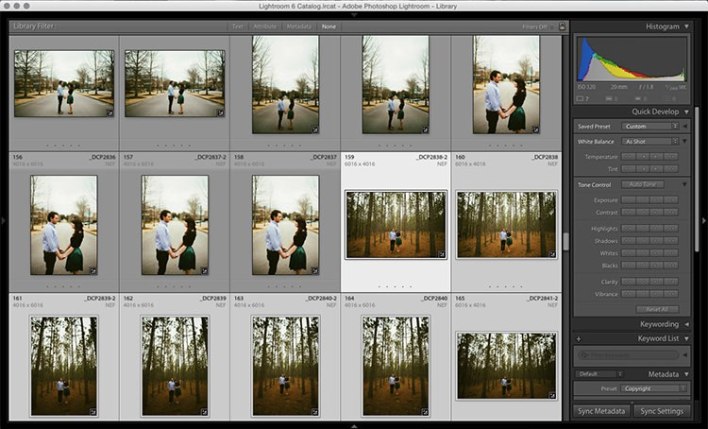
If all photos are similar, then applying preset on import works, but when different presets have to be used on varying scenes and poses, the library module works better and faster. Instead of working on one image at a time, the library module works on a group of photos at one go or as batch processing. This technique proves extremely helpful when modifying wedding pictures of similar photoshoots that involve indoor, as well as outdoor shooting at the same time, where light conditions keep altering every now and then.
Steps to follow:
- The first image in the set is to be selected first. Now, hold down the control button to drag other photos on which you wish to apply the same preset.
- Click on the drop-down menu under the ‘Saved preset’ present at the top of the Quick Develop panel. The settings will be updated from that preset to all the selected pictures/photos.
Technique 3: Edit in the Library Module
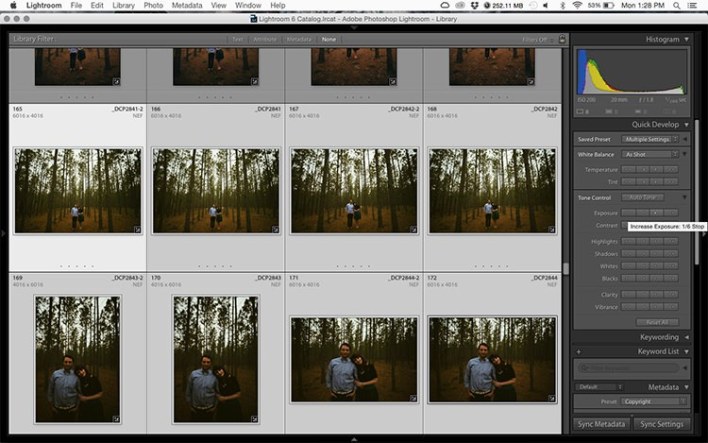
Faster than the Develop module, the library module runs much smoother. Having already adjusted the presets to your images, broader adjustments need to be made to your photos now. Major adjustments can be made through editing using the library module like exposure, white balance, contrast, etc. The best part is that these adjustments can be applied to multiple photos at once, thereby adding to their consistency and even saving on time.
How to apply the library module technique, in batch edit lightroom:
- First, press control and click to add the photos (a group of images) of your selection in the Library module.
- Now, click the arrows under Contrast, Exposure, and other applicable options in the Quick Develop panel on the right to apply all changes to the selected photos at once.
- The photos can be zoomed in and zoomed out by using the + or _ to enlarge or minimise the library view. This allows you to get a better view of the adjustments that are being applied to the photos in batch processing.
Technique 4: Sync Adjustments Across Multiple Photos in the Develop Module
Having applied the broad adjustments, a few things in your images may require fine-tuning. These may include alterations like curve adjustment, adding a gradient filter, fine-tuning a bright sky, and so on. These changes need to be made in the Develop module; however, these can be applied in batch processing instead of doing it one at a time.
Steps to follow:
- Apply the adjustments to an individual photo in the Develop module.
- Select multiple photos by pressing control plus click in the Develop filmstrip or Library grid view.
- Select ‘Sync,’ located at the bottom of the right-hand panel, the left button beside ‘Reset.’
- Now, with all the selected photos, check the options that you want to sync. Any adjustments made in the Develop module should be included in this.
Be careful about the following few points when using batch edit lightroom:
- Refrain from syncing anything that you do not wish to be applied to all the selected images.
- Be careful when using the adjustment brush on the skin in one photo and syncing that to another photo. Many a time, when the subject moves slightly, the brush is applied to the wrong part of the image.
Final Thoughts
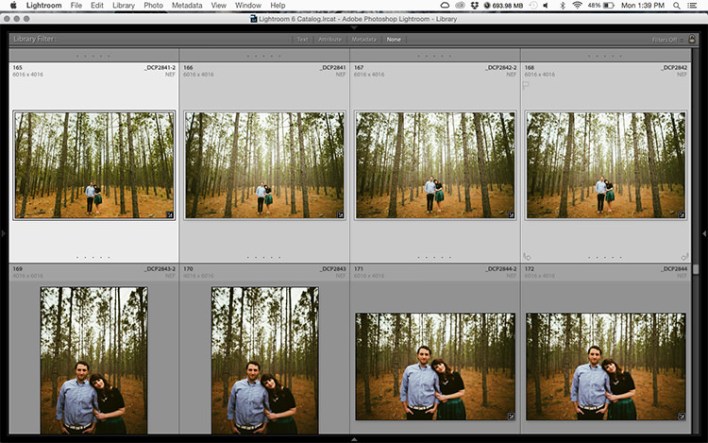
Lightroom batch processing is a huge time-saving tool. Where batch processing can be found in many applications, lightroom batch processing is especially powerful as Adobe Lightroom being a non-destructive editor that allows specific settings to be applied over a group of photos instantly without restricting its ability to be able to fine-tune each image individually as well. In a nutshell, with batch edit Lightroom, you can now get more work done in a much lesser time frame.
Thus, supercharging your editing workflow, batch editing enables automated processing to help you get the right kind of pictures as you expected them to be. Also, batch processing images can prove fruitful for all photographs, be it a wedding photographer or simply a portrait photographer. With proper adjustment and careful planning, it can yield the desired results by adding gravity to your captures in no time at all.
Looking to sharpen your lightroom skills? Join our top-rated professional diploma in adobe lightroom today!


